Hello everyone,
Welcome to February. Singles awareness month. hahaha
This month's kit from Urban Scrapbook features paper from Bo Bunny.
My page features an XO cut file from Silhouette Deign Store, and some word phrase stamps from Tim Holtz. The rest of the supplies are in the monthly kit - ok I lied, I used some wine color embossing powder for the wooden hearts.
you can check out the other design teams pages over at the Urban Scrapbook blog here
Showing posts with label Bo Bunny. Show all posts
Thursday, 1 February 2018
Wednesday, 4 May 2016
Urban Scrapbook's Monthly Challenge Kit - May
Hello my friends,
This month's kit at Urban Scrapbook features the gorgeous "Secret Garden" line from Bo Bunny.
It's a well known fact that I LOVE Bo Bunny. This line is perfect for spring with an abundance of lilacs, birds and roses all in my favorite colors!
I put the Martha Stewart punch to good use on this layout, and the photo? Well that's me at the Atlantis resort in Nassau, Bahamas. What an awesome day we had there.
be sure to check out the other layouts our team created by heading over to the store's blog here
thanks for stopping by, now "get lost"
Thursday, 17 December 2015
Joy to the World (in a Box)
Another SVGCuts Box card. This one is in the kit too.check it out here
I used Bo Bunny paper as well as some plain white Cardstock.
Quick post... I am almost done showing you my Christmas cards. I actually made a lot of different ones this year. I made a few 3d projects that I will post as well, so I better get on it. See you soon.
Sunday, 14 December 2014
12 Days (or so) of Christmas Cards
Hi again:
I did some retro Cards with the Bo Bunny "Candy Cane Lane" paper line.
These great little signs and the vintage ornaments are from the Silhouette online store.
I used Peacock Feathers, Festive Berries, Spun Sugar and Mustard Seed distress inks/markers to add color to the signs.
see you soon
I did some retro Cards with the Bo Bunny "Candy Cane Lane" paper line.
These great little signs and the vintage ornaments are from the Silhouette online store.
I used Peacock Feathers, Festive Berries, Spun Sugar and Mustard Seed distress inks/markers to add color to the signs.
see you soon
Saturday, 6 December 2014
Rustic Ski Lodge
Hi everyone,
Here is my finished project:
I wanted to share yet another Christmas decoration I made this year. It seems I am really into rustic things this time around. I had it in my mind to make a ski lodge, but I needed to adapt one of the cut files I had. Now, never modifying any designs before, it was certainly a "learning curve" I wanted to add a balcony to the lodge, but that meant I needed French Doors instead of a window. After many hours of ungrouping and welding and editing, I managed to incorporate the look I wanted.
You can check out the original look of the house here:
Lots of printing patterned paper. The "logs" are in the silhouette program already. I just fiddled around with the shape and size. If you go into patterns, there is a jpeg called "poles". Draw a rounded rectangle and fill pattern in. Instant logs!
The main construction was paper from Bo Bunny's new winter line, "Altitude"
The truck and signs are actually stickers I had left over from our December Kits at Urban Scrapbook
"Warm and Cozy" by Carta Bella.
I would love to visit a lodge like this, I wouldn't do much skiing, but I'd sit by the fire and drink hot chocolate and Baileys.
Thanks for looking, keep warm and cozy. See you soon
Friday, 1 August 2014
Mid Summer's Night Blog Blitz - Day 5
Welcome to day 5 of my summer projects blog blitz.
Today's pics are featured at Urban Scrapbook in my hometown - Edmonton.
Our monthly page kit always includes an abundance of supplies to get creative with. This time it features "Lemonade Stand" by Bo Bunny. This line is a favorite of mine ( gee I wonder why) Look at these great colors! My Faves!!!
The map of Thailand is a cut file from Silhouette. Memory Box, Dees Distinctively and IO dies were also used in the layout.
Yes those are my feet in the pic chillin' at the sweet man's house on Ko Siboya, Thailand - our second home.
More dies and the 3D orchid die from IO. Once you figure out how the flower goes together, it looks really cool. My first thought was " how does this thing even work?" Luckily they have a youtube video on assembly.
The map of Thailand is a cut file from Silhouette. Memory Box, Dees Distinctively and IO dies were also used in the layout.

More dies and the 3D orchid die from IO. Once you figure out how the flower goes together, it looks really cool. My first thought was " how does this thing even work?" Luckily they have a youtube video on assembly.
Thanks for looking, you can check out the other July pages from the Urban team here:
http://urbanscrapbook.blogspot.ca/2014/08/august-page-challenge.html?m=1
See you soon
Friday, 11 July 2014
Seaglass Lantern
Hi again,
I wanted to share this project I made for myself. Tropical and ocean themes just makes me happy, so here is my happy 3D project...
It started with a great cutting file from SVGcuts.com I love Mary's designs, they just cut perfectly every time. I added/welded the palm trees to the window to keep it beachy.
I spend a lot of time on Pinterest. I often fall asleep with one finger on my iPad still trying to pin great "pinspirations" (sometimes I pin things accidentally while falling asleep hahaha)
Anyway, I saw this great "faux sea glass" technique and had to try it.
I picked up the Frost translucent paint by Martha Stewart at my local craft store, painted the charms and plastic following the technique described and sure enough, it worked!
here you can see the embellishments better. Great die cuts from a variety of companies : IO,memory box, Dee's Distinctively and my embossing folder from Spellbinders which I LOVE!
here's a better look at the "sea glass" windows
and below it's lit up with some battery operated green led lights
The challenge over at Simon Says Stamp (Monday's) is Start from Scratch.
http://www.simonsaysstampblog.com/mondaychallenge/?p=1706
This project started out as plain brown paper and some recycled plastic packaging.
Thanks for taking a peek at the new addition to my beach decor.
I wanted to share this project I made for myself. Tropical and ocean themes just makes me happy, so here is my happy 3D project...
It started with a great cutting file from SVGcuts.com I love Mary's designs, they just cut perfectly every time. I added/welded the palm trees to the window to keep it beachy.
I spend a lot of time on Pinterest. I often fall asleep with one finger on my iPad still trying to pin great "pinspirations" (sometimes I pin things accidentally while falling asleep hahaha)
Anyway, I saw this great "faux sea glass" technique and had to try it.
I picked up the Frost translucent paint by Martha Stewart at my local craft store, painted the charms and plastic following the technique described and sure enough, it worked!
here's a better look at the "sea glass" windows
and below it's lit up with some battery operated green led lights
The challenge over at Simon Says Stamp (Monday's) is Start from Scratch.
http://www.simonsaysstampblog.com/mondaychallenge/?p=1706
This project started out as plain brown paper and some recycled plastic packaging.
Thanks for taking a peek at the new addition to my beach decor.
Thursday, 20 March 2014
A little bit o' luck
Hi everyone,
Sihouette cut files, round punches, gold spray, green thread, Bo Bunny papers (filled with chocolatey treats inside the pot)
Gosh it's been a while. My trip to Vietnam and Thailand was awesome. We had a really good time, especially getting away from winter for a month. I was lucky to have +34*C for a few weeks. However, back to reality for me. Oh well, next year...
I made a few St. Patrick's day projects and brought them to work to share with my gal pals.
I am also linking this up to the Simon Says Stamp Monday challenge blog here:
http://www.simonsaysstampblog.com/mondaychallenge/challenge-lucky/
Here we go...
Sorry, this pic is a bit blurry, but it's the only one I took of the whole set.
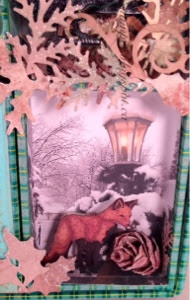
Bo Bunny paper, Prima Paper, stamps, and Silhouette cut files ( shamrock flourish)
Silhouette cut file, scraps, celtic stamps, Gold Lame spray from Heidi Swapp

Hope you enjoyed my St. Patrick's day projects. We had fun celebrating at the pub on Monday, after all, what's March 17th without green beer? See you soon.
Wednesday, 29 January 2014
Fishing Trip
Hello again,
I wanted to share the birthday card I made for the man. He loves fishing and camping in the summer. However my idea of roughing it is staying in a hotel without room service HAHAHA!
I used the Bo Bunny papers for this 3D card.
I used the Tattered banner die and a birthday sentiment from Stampa Rosa (it's an oldie)
next I made a gift box and mini trailer to go with the card.
SVGcuts.com has some awesome kits. This particular one was from "Camp Firefly"
Using paper from my Prima Art pad, I cut the pieces and began assembly.
The huge compass stamp I have fit perfectly on the top circle of the box (life's little victories)
The little jack russell file is on the Silhouette store
I made a fishing rod out of a bamboo skewer
Here it is all finished. These 3D projects are always a big hit with people I show them to. It's amazing what you can do with paper and glue!
The little jack russell file is on the Silhouette store
I made a fishing rod out of a bamboo skewer
Here it is all finished. These 3D projects are always a big hit with people I show them to. It's amazing what you can do with paper and glue!
Thanks for looking hope you'll stop in again soon.
Now go get your craft on...
Friday, 13 December 2013
Christmas Configurations
Hi again,
Lots of evergreen bough and antique linen distress inks and clear rock candy dry glitter used on this project.
Inside...
Inside cover
I love the way the carollers turned out. I used black distress crackle paint and graphite viva paste over top.
I had an extra picture lying around, so I lined the box with it and added some embellishments. The fox is from Bo Bunny paper.
This picture of Santa and the little boy was another pic I had lying around. Tim Holtz had provided a link to all these great vintage Christmas photos. ( I think it was one of the 12 tags of Christmas 2010?)
The sled is from Bo Bunny, the skis are made from a popsiscle stick.
So remember the last blog post, when I mentioned the configurations book and the card to go with it? Well here was my inspiration, thank you so much Jan Hobbins, you are a creative master.
Alright, so I had most of the supplies in my art room and a few that I changed up at bit,

Inside cover
I love the way the carollers turned out. I used black distress crackle paint and graphite viva paste over top.
I had an extra picture lying around, so I lined the box with it and added some embellishments. The fox is from Bo Bunny paper.
This picture of Santa and the little boy was another pic I had lying around. Tim Holtz had provided a link to all these great vintage Christmas photos. ( I think it was one of the 12 tags of Christmas 2010?)
The sled is from Bo Bunny, the skis are made from a popsiscle stick.
Subscribe to:
Posts (Atom)