Showing posts with label Silhouette. Show all posts

Tuesday, 15 December 2015

Sleigh Bells 'round the Bend

Hello,
Here's a card I designed on the Silhouette Studio software. 
I took a plain bendy card file and added a tree line on the back and middle panels.
On the front, I cut and welded the horse and sleigh. I was amazed at the precise cut the machine did with the reigns. They are so fine, I thought they'd tear. Yay Silhouette machine! 
I cut everything in white, then added color with Distress inks, Fluid Chalk inks and stamps.
I used that awesome Heidi Swapp "believe" die on the card above.
On the one below, I typed the words using the Mistral font and cut them out with the Silhouette
A few extra trees and some Snowflake paste (Prima) finish off the bendy card and gave it just a little more sparkle and dimension.
Thanks for stopping in, see you soon.
Laurie

Friday, 4 September 2015

Beach Thug Life

Hi again, I mean, yo yo what up yo? (yeah, I'm not very gangsta am I? lol)

So I kept playing with my Crazy Birds, This time I dressed them up hip hop style. So funny...I laugh every time I look at them with their shirts and sunglasses.  I sketched a cap for Long Beak. Once I had it attached, my head went off into a Bird gang direction.  Isn't a bunch of crows called a "murder"? Which led to Gangsta, which led to Beach Thug Life.
The palm trees were cut on my Silhouette and I cut the title with Tim Holtz alphabet sizzlets.
Kaisercraft paper was used in the background, and I actually made the "sky" paper with Watercolor paper and Color Burst powders from Colorbox.

Well that's about it, peace out yo.

Friday, 6 March 2015

St. Patrick's Day Green Beer Mug

Mmmm green beer...

Hey everyone, bottoms up!  I made a really fun home decor item for our annual "paint the town green" event we go to every March 17th. One of the sweet man's coworkers always arranges a St. Patrick's day celebration at the local pub downtown. It usually starts at 11:00 when the bar opens, and goes all day long.  We drink lots of green beer and Guiness. Good times.
This project took the most time to create, I had to modify the "3D Hot Cocoa/Coffee Mug" by Lori Whitlock quite a bit. I made it really tall, and altered the panels to look more like a beer mug.
Next I stamped on the base of the mug with a great background stamp from Tim Holtz. I used the new color "Cracked Pistachio" and some "Squeezed Lemonade"  to give the look of green beer.
I added  frosted film over the whole base as well.
The panels were embossed 2 times each with UTEE

for the other decorations, I used the "3D Leprechaun Hat" from Jennifer Wambach
I cut it out on white paper, so I hand colored everything to make it a bright vibrant green.
The Irish crown was the "Happy St. Patrick's day Borders Set" from Studio Illustrado
I put some foam core in the top of the mug and added some texture paste (beer foam). That actually worked out well, because it acted like "glue" to keep the hat and crown from moving around.
A little more embellishment completed the overall project.
Thanks for checking out all of my St. Patrick's Day projects. If you live in Edmonton, you can come check them out at Urban Scrapbook.  see you soon...

Thursday, 5 March 2015

St. Patrick's Day treat boxes

Hi everyone:
Here's a couple of cute little treat boxes I made for St. Patrick's Day.

This first one was modified quite a bit.  it's the "Shamrock medium 3D Block Stick Decor" from Snapdragon Snippets.  I just wanted the shamrock so I cut out the top using an oval die before I glued it on to the sides.
The paper is from Bo Bunny.
This one turned out really cute.
Another Snapdragon Snippets file "Pot 'O Gold Box"
and the "Background Shamrocks"
I then cut many many circles out of gold cardstock and glued them together so they were shiny on both sides. I had an OLD stamp in my stash (4 sided celtic shapes from Judikins), so I stamped the coins with potting soil archival ink.
The little swirlies were left over from  the above paper cut out.
Now all I have to do is find some gold covered chocolates to fill them up!
Thanks for taking a peek, see you next time...
just a quick edit here...
I found some gold covered treats and took a quick pic to show
you what they look like filled with goodies. 

Wednesday, 4 March 2015

St. Patrick's Day Box Card

Box cards are still a fun project to make. They fold flat for giving and look great on display.  I created this one with a few cut files on my Silhouette.

Again, the Authentique paper line was my choice. I cut the box using the "a2 Box Card-Nautical" by Lori Whitlock (modified of course - nothing nautical about this project haha) I added some shamrocks to the panels as well  "5 clover shamrock set"
Can you see the foam on the beer mug? Puffy paint!
the inside was a combination of a few elements... "nested St. Patrick's day numbers 1-10"
                                                                          "St. Patrick's day borders set"
and "March" was created by me, using a font in Silhouette Studio. I have no recollection of which one(sigh)
The best part was saving the strip of paper you cut off your 12x12 sheet.  Authentique always includes a lovely quote on their end strip - don't throw those away! that's a great bonus item.
Thanks for checking out my post, I will see you soon with another project. 

Tuesday, 3 March 2015

Happy St. Patrick's Day card

Hi everyone,
Here's the second card I made for St. Patrick's Day.
This one was super simple. The main circle element was a cut file from Echo Park "Happy St. Patrick's Day"
I used the "Background Shamrocks" again, and the Authentique paper line.
A little gold embossing powder finished off the background

Monday, 2 March 2015

I'm So Lucky

Hi everyone!

Here is the first card I want to share with you.
  I started with a silhouette cut file "umbrella kiss" from Studio Illustrato a used black UTEE to create a thick glossy coat.
  Next, I stamped my new Finnabair background stamp in green on a plain white card stock and added a little shading around the edges with the same mowed lawn distress ink.
  The patterned paper is from Authentique.
  The bottom embellishment is another silhouette file: "Background Shamrocks" by Snapdragon Snippets.
It got the UTEE treatment as well but I sprinkled some shabby green embossing powder on it as well. A few more shamrock cut outs completed the card.
I am posting this one on Simon Says Stamp Monday challenge blog: "just a hint of clover

Thanks for looking today, see you soon.

Wednesday, 28 January 2015

You've Got Mail

Hello again. 
I wanted to share this cute little mailbox I made.  It's a silhouette cut file from Lori Whitlock. And embellished with some extra hearts and flowers I had hanging around on my desk. 

I hinged the front part of the mail box and created a base and pole out of my hoarded recycles. (You just never know when they will come in handy) 
I made a few little "love letters" to go inside the mailbox too. Overall, a fun little project that looks cute on a table. Happy Valentine's day. 

Thursday, 1 January 2015

Happy New Year

Hi everyone,
It's a new year and I am already behind!
I made these cards for my co-workers before New Years Eve, but I didn't get around to posting them until now. Ah well, what can you do?

The cards were cut with my Silhouette Cameo.

This one was quite a happy accident. The print and cut was off by an 1/8 inch so I ended up throwing 2 coats of clear EP on it, then used Shabby Green (Stampendous) on top.
My dear old snowflake stamp (PSX - remember them?) stamped in white pigment ink created a snowy background.
The weathered clock die got the crackle treatment. Now if anyone has tips on how the bloody heck I can get my crackle paint to behave as it should, PLEASE share with me.  I have no luck with it. 
See look, you can barely see any cracks.

My second card here was pretty fun. Again, a Silhouette cut file. I used my favourite paper for the card base (Simple Stories) and cut everything else out in white to add my own colours. I used antique linen, spun sugar and seedless preserves.
Thanks for stopping by. I will be back with my January page kit from Urban Scrapbook next time.
See you then.

Friday, 19 December 2014

12 Days (or so) of Christmas Cards

Hi everyone,
here is another card I'm sharing with you
the deer are  from the Silhouette store.
On the white one, I left it as is and matted it on an embossed background (love that embossing folder!!)
The stamp is from Indigo Blu which I stamped with dark brown Fluid Chalk ink and highlighted with Mustard Seed distress ink

The brown deer was embossed with Chocolate Twinkle E.P. and I added a couple die cut snowflakes from Impression Obsession
Hope you like them.

Sunday, 30 November 2014

Warm and Cozy Christmas

Hi Everyone,
We received our December kits from Urban and once again, we were allowed to think outside the box and have fun designing any type of project.

Hahahaha, anyone that knows me and my passion for 3D paper art won't be surprised by my December submission
The paper line this month is from Carta Bella  "Warm and Cozy".  Gorgeous thick cardstock in rustic rich tones.

Here's what I did:
I constructed a shadow frame using 12x12 chipboard.  The sides are 2 inches deep. I covered the chipboard with mossy green paper and trimmed out the sides with paper from the kit.

Now that I had a base to work with, I went crazy with the Silhouette machine using papers included in the kit. I have used the following cut files from the Silhouette store:

3D Deer Head ID 36565/6 Megan Hardy designs (2 parts)
3D layer quad bow ID 52257 Jamie Cripps
Moose Frame ID 3611  Joel Pilcher
Old Skis ID 34771 Silhouette
Classic Sled  ID 23704  Jennifer Wamback
3D outhouse ID 46032  Marji Roy
Trees   ID 53331  Marji Roy
I also used  a couple of SVGCuts projects on here as well
witchy hat
I adapted it to become a Santa hat
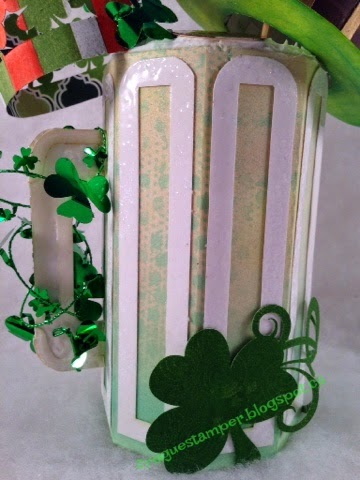
The thermos is from Camp Smore kit thermos
but cut at 50 % size


The "wreath" around the deer head is a combination of Tim Holtz' Festive Greens  and a Martha Stewart punch 
Can you spot the frosted stars on the background? They were made with frosted film, die cut with Tim Holtz' stacked stars and stamped with his sweater background stamp. I used white Stayz on ink
Stickers from the kit help fill out the scene, as well as the mini blueprint stamps for the lantern and the snow shoes.

Tim Holtz' movers and shapers bell and another silhouette cut file bell.
Thanks for stopping by, I'm sure I missed a few things, but I had so much fun creating this Warm and Cozy December project. You can check it out at the store if you live near by. Come on down, we love new customers!
Here's a link to Urban's blog.
http://urbanscrapbook.blogspot.ca/?m=1

Thursday, 20 March 2014

A little bit o' luck

Hi everyone, 
Gosh it's been a while. My trip to Vietnam and Thailand was awesome. We had a really good time, especially getting away from winter for a month. I was lucky to have +34*C for a few weeks. However, back to reality for me. Oh well, next year...

I made a few St. Patrick's day projects and brought them to work to share with my gal pals.
I am also linking this up to the Simon Says Stamp Monday challenge blog here:

http://www.simonsaysstampblog.com/mondaychallenge/challenge-lucky/

Here we go...
Sorry, this pic is a bit blurry, but it's the only one I took of the whole set.

Bo Bunny paper, Prima Paper, stamps, and Silhouette cut files ( shamrock flourish)

Silhouette cut file, scraps, celtic stamps, Gold Lame spray from Heidi Swapp

SVG cuts file from "surf shack" kit, Bo Bunny paper, Tim Holtz kraft paper

Sihouette cut files, round punches, gold spray, green thread, Bo Bunny papers (filled with chocolatey treats inside the pot)

Hope you enjoyed my St. Patrick's day projects. We had fun celebrating at the pub on Monday, after all, what's March 17th without green beer? See you soon.